Monday, July 30, 2018

Rajasthani Rabri Malpua with a Twist

Rajasthani food is vast and I'm a big fan of it especially its desserts. The aroma of ghee is so tempting. The richness comes from the usage of dry fruits and khoya. I still don't know whether its 'Khoya' or 'Khowa' but I love to include it in my desserts. People tell me that I have a 'sweet tooth' but the reality is my entire mouth is a sugar addict. My mood becomes fresh whenever I take a bite of my favourite dessert. I think this happens with every sweet lover.

Mawa or Khoya malpua with rabri is a classic Rajasthani dessert. I absolutely love to indulge my hot malpuas with chilled rabri. In this recipe, I've added some twist to the rabri and malpua. I always love to add some innovation to my recipes.  Read below to find out the recipe.


Ingredients:

For the Malpuas:

  • Mawa or Khoya: 250 gms
  • Milk: 500ml
  • Maida: 100 gms
  • Sooji or Rava: 50 gms
  • Baking Powder: 1/2 Tsp
  • Baking soda: 1/4 tsp
  • Sugar:1/2 a tsp
  • Saunf Powder: 1 Tsp
  • Crushed Black Pepper: 1 Tsp
  • Ghee: For deep frying
For the Syrup:
  • Sugar: 2 cups
  • Water: 2 cups
  • Rose petals: 1 cup 
  • Rose essence: a few drops
  • Juice of a lemon

For the Rabri:

  • Milk: 1 litre
  • Carrot: 3 no.s
  • Cardamom or Elaichi powder: 1/2 tsp
  • Ghee: 2 tbsp
  • Sugar: 6 Tbsp (More or less according to your taste)

Method:

For the Rabri:
  • Peel cut and boil the carrots and let it cool down a bit.
  • In a blender, blend the carrot, cardamom powder and sugar into a fine paste.
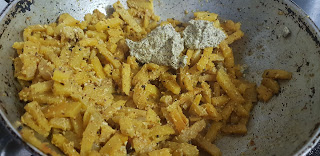
  • Heat ghee in a frying pan and add the carrot mixture and cook it the way you cook carrot halwa in a medium to low flame. But remember to keep the colour of the carrot orange.
  • After 3 minutes, add the milk and let it come to a boil.
  • Now, wait for the milk to turn thick and keep stirring in between to prevent it from burning. Also, scrape the sides of the pan and add the milk particles to the rabri.
  • Cook till the rabri becomes thick according to your desired consistency.

For the Malpuas:
  • Boil the milk and switch of the flame. Wait for a few minutes and the khoya to the milk and gently stir to make the khoya incorporate to the milk and set aside.
  • Sift in the dry ingredients except for the sooji and sugar. After sifting, add the sooji, sugar and the milk mixture little by little and make a batter neither too thick nor too thin. Add maida if the batter is too thin and add milk if you find the batter to be too thick. It should have a pouring consistency and set aside for 30 minutes.
  • After 30 minutes, heat ghee in a kadhai, use a rounded ladle to pick some mixture and pour in into the hot ghee. Make sure the kadhai is thick from the bottom.
  • Don't disturb the malpuas. The may appear to be getting stuck to the bottom of the kadhai. With time they will come up for sure. If it doesn't come up on its own, use a metal tong to lift up the malpuas very gently.
  • Fry till it turns golden brown from both sides and put it over paper towels for excess fat absorption.


For the rose syrup:

  •  In a deep bottomed pan add the sugar and water and let it come to a boil.
  • Add the rose petals and lemon juice.
  • Cook until you get the syrup in one string consistency. 
  • Add a few

For serving:

Put the malpuas to the hot syrup and let it stand for a few minutes. Now pour some rabri on a plate and place the malpuas gently on top. Garnish with rose petals and sliced pistachios. 

Tip:
  1. Malpuas require resting time. Make sure you make them rest for 30 minutes to an hour for the better outcome. Meanwhile you can complete the other steps.
  2. BE GENTLE WITH THE MALPUAS WHILE FRYING AND BE PAITENT.  I was impatient while cooking my first batch and used a metal spatula (our beloved khunti) to pick up the malpuas resulting a ruined one. Wait for atleast 2 to 3 minutes before turning sides of the malpuas. Always fry them medium to low flame.
  3. Don't get disheartened if the malpuas don't turn out properly. I ruined 6 malpuas before getting the beautiful golden ones.

Hope you enjoyed the recipe. I had clicked many pictures but lost them due to some reasons. If you are stuck somewhere in between the steps, ask me. I'll be there for your help. The recipe looks tough but in reality, it isn't. If I can make it, everyone can. 


Friday, July 27, 2018

Easiest Mutton Kheema Mughlai Parantha

My brother in law asked me to make Mughlai parantha when he visited our place last time. I was a bit sceptical before preparing this as I thought it would be tough and beyond the bounds of my capacity. I've tried making it once earlier following a recipe book but it turned out to be a big disaster. That failure lived in my mind until my brother in law encouraged me to make this for him. My second attempt was a big success. My brothers in law and my husband are the biggest food critic ever created by God. They can taste and smell any weirdness in a dish within seconds. It is tough to impress them so when they appreciate the cooking skills I possess, I feel blessed.

This was my third attempt and was even more successful than the second one. The key to having the perfect Mughlai Parantha is having a good dough which is to be rolled very thin. I've used last night's kheema matar mixture. If you want to make the kheema like the way I made please click here. Also, if you are a vegetarian you might use paneer bhurji, minced mushrooms, soya granules or any vegetable of your choice and instead of egg wash, use maida mixed with water to seal the paranthas but make sure that the stuffing is dry else you won't be able to stuff the paranthas properly. Finally, without wasting any moment, let's learn the recipe.


Ingredients:

For the Dough:


  • Maida or All purpose flour: 1 cup
  • Atta or whole wheat flour: 1/2 cup
  • Salt: A pinch
  • Sugar: A pinch
  • Oil: 2 tablespoon
  • Water: To knead the dough

For the stuffing:

  • Leftover mutton kheema
  • Eggs for stuffing and egg wash
Refined vegetable oil for deep frying

Method:

  • Strain the flours and add the salt and sugar. Then add the oil and water to knead a soft dough. Let the dough rest for 15 minutes.
  • Meanwhile, heat the kheema in a kadhai and let all the gravy evaporate. You'll be left with a dry mutton mixture.
  • Take three tablespoons of the mixture in a bowl and break an egg and mix it along with the kheema mixture.
  • Now roll the dough as thin as possible and give it an egg wash.
  • Put the kheema mixture on the centre of the rolled dough. Spread the mixture and fold as shown in the picture.


    .
  • Heat oil in a frying pan and carefully put the folded parantha in the hot oil and fry till golden brown.
  • Take out the fried paratha from the oil and put it on an absorbent paper.
  • Serve the parantha with some salads, ketchup or kasundi.


Tips:

  • The quantity of water to knead the dough can't be exactly determined. It depends on the quality of the flour. Add water little by little to knead a soft and smooth dough.
  • I made 2 paranthas using the mixture of 3 tablespoon kheema masala and an egg. The requirement of the mixture depends upon the size of the parantha.

Thursday, July 26, 2018

Easiest Mutton Keema Matar

This is a basic mutton keema cooked with green peas.'Keema' is basically minced meat. In India, it is cooked with a variety of spices and vegetables. It pairs well both with rice and rotis.

My father in law loved mutton keema which our dear 'Lakshmi didi' makes. She has been cooking for us for 25 years and can cook Bengali dishes even better than most Bengalis. In fact, I have learned cooking many Bengali dishes from her. I've always tried to replicate her Keema curry recipe but never been able to do so. So I've noted down the exact measurements and steps of her recipe and noted it down. I wasn't able to click enough pictures so will be posting just one at the end.


Ingredients Required:


  • Mutton Kheema: 1/2 kg
  • Onions: 2 finely chopped
  • Ginger-garlic paste: 2 tablespoon
  • Tomato: 1 finely chopped
  • Blanched Frozen Peas: 1/2 a cup
  • Cumin Powder: 1 tablespoon
  • Turmeric Powder:1/2 teaspoon
  • Chilli Powder: 1 teaspoon (More or less according to your taste)
  • Garam Masala Powder: 1/2 teaspoon
  • Ghee: 1 tablespoon
  • Oil: 3 tablespoon
  • Sugar: A pinch
  • Salt: To taste


Method:

  • Wash the mutton kheema and put in into a pressure cooker. Add some salt and little water and cook for 4 whistles or until the meat is cooked.
  • Boil some peas in a separate vessel.
  • In a kadhai, heat some oil till smoking point then add the onions and saute till they turn translucent.
  • Add the ginger garlic paste and the tomatoes and saute once again.
  • Add the powdered masalas and wait till the oil separates from the masala.
  • Add the mutton kheema and blanched peas to the masala and cook everything together.
  • Cook for 5 minutes or until the oil separates from the kheema masala and top it up with some ghee and garam masala powder.
  • Serve with rice or bread of your choice.
 Hope you enjoy this recipe as much as I do. If yes, please like and comment below.
.

Thursday, July 19, 2018

Mutton Curry Bengali style

In many Bengali families, Sunday is incomplete without 'Mangsher Jhol' ( Bengali mutton curry) and 'Bhat' (Rice). The entire house fills up with the aroma of the mutton curry when it's being cooked. The entire process of 'koshano' is never ending and the moment the pressure cooker releases its pressure, everyone's seated on their respective places and serve themselves with this heavenly combination. I think every Bengali waits for the entire week to treat themselves with this lovely dish which is somewhat of a 'comfort food' for them.

Every family has a different recipe in their notebook. Some like to add curd, some don't add onion and garlic, some try to make a different recipe every week. I try to search something new every time but end up preparing the same. My version of mutton curry has potatoes and a semi-thin gravy. Bengalis love to add potatoes in everything they cook and are proud of it. People who tend to avoid mutton curry due to many reasons also eat the potato and gravy.  So without wasting any further moment, let's learn this recipe:

Ingredients:


  • Mutton- 1/2 kg
  • Onions- 4 thinly sliced
  • Tomato- 1
  • Potatoes: 4
  • Ginger and garlic paste: 2 Tbsp
  • Tumeric Powder: 1/2 Tsp
  • Red Chilli Powder: 1Tsp
  • Kashmiri Red Chilli Powder: 1 Tbsp (Optional)
  • Saunf Powder: 1 Tbsp (Optional)
  • Cumin powder:1 tbsp
  • Cloves: 4
  • Cardamom Pods: 4
  • Cinnamon Stick: 1 small about an inch long
  • Bay leaf: 1 Medium
  • Dried Red Chilli: 1
  • Mustard Oil: 5 Tbsp
  • Salt: As per requirement
  • Water: 2 Cups
  • Sugar: 1/2 Tsp
  • Ghee: 1 Tbsp

Method:


  • Heat Mustard oil in a kadhai till it reaches its smoking point. Add the sugar and let it caramelise. This ensures the red colour in the gravy. 
  • Now temper the oil with bay leaf, dried red chilli, cloves, cardamom and cinnamon sticks.                                                                                 
  • Add the sliced onions, ginger-garlic paste, tomato and they dry spices and keep sauteing.                                           
  • After a minute or two of sauteing, add the mutton and saute again for about a minute.                                                                                                                                                                                                       
  • Cover and cook till all the water is evaporated and the oil is separated.  Meanwhile, fry the potatoes by adding some salt and turmeric powder.                                                                                                                                                                        
  • Transfer the mutton to a pressure cooker, add adequate water and pressure cook for about 5 to   6 whistles                                                                                                                                                                       
  • Let the pressure release on its own then add a tablespoon of ghee and serve when its hot with some steamed rice.                                                                                                                                                          
Tip:

  • The cooking time depends upon the quality of the meat. If the meat is tender and fresh, less time is required to get the perfect juicy meat.
  • Generally, Saunf Powder isn't added to a Bengali mutton curry. Since this is my version, I've added it to the dish.
  • Water can be added more or less according to the consistency of the gravy required. 


Tuesday, July 17, 2018

Myths Related to Babies

A myth is an idea widely held but is actually a misconception. Many countries have their own series of myths and ill practices in the name of certain traditions which is absolutely incorrect. Even newborns are also sometimes a victim of such false belief.  Some of them are funny, but most of them ultimately prove to be dangerous for the little ones. Many parents have doubts regarding the application of such practices. Some come under the grasp of the social boundaries and follow such beliefs while others think a lot and keep themselves away from such practices. During the initial days of motherhood, I also heard about some famous ill conceptions regarding newborns. My family dismissed all of them and gave me their full support. Let me list some of the myths I've heard regarding newborns:
Image Source

  1. Witch's milk extraction: Some babies are born with swollen nipples due to various hormonal reasons. They may also discharge some milky substance which is completely normal. This disappears within a few weeks. There is a myth prevailing that the forceful extraction of this 'milk' is necessary to prevent larger breasts in the future especially in the case of baby boys. This act can lead to the accumulation of abscess in the baby's nipples and may cause a terrible infection. Such acts should be stopped immediately and wait for the nature to rectify if necessary.
  2. Vigorous Massaging: Massaging is very good for the development of the baby but vigorous massaging can actually be dangerous. Generally, we appoint 'Daimas' for our baby's massage sessions. But we must keep an eye on how she massages the baby. Vigorous massaging can hurt the baby's tender body parts. Always say 'NO' to the things which you think is unnatural such as hanging the baby upside down, over twisting and turning, etc. We all know that we have to be gentle with the babies. This 'gentleness' should be applied even during his or her 'maalish' sessions.
  3. Mixing Baby Cereals With Milk: Some people believe that mixing baby cereals with formula helps to make the baby sleep longer. This is again untrue. In fact, mixing baby cereals with formula can lead to choking hazards. Infants merely know how to swallow. If we start mixing cereals in their milk bottles, swallowing would be more difficult. There is no significant theory which justifies the addition of cereals. Moreover, babies don't even require any additional cereals even after 6 months of age. Home cooked foods are enough and are more nutritious than any store-bought cereals.
  4. Colostrum must be discarded: Earlier people believed that colostrum must be disposed of but in today's world, it is referred to as 'liquid gold'. It is a thick yellowish coloured milk which is discharged during the initial days after delivery. It is highly nutritious and has many immunity boosting properties. It should be fed to the newborns and shouldn't be thrown away.
  5. Making baby taste honey: In some cultures and believes, newborns are made to taste honey because of various cultural beliefs. Infants, especially under 6 months of age shouldn't be given anything apart from breastmilk. Doctors believe to give honey and other forms of sugar (excluding sugar found naturally in fruits) only after the baby turns a year old. Honey may contain spores of bacteria which may cause certain infections. It doesn't mean that the honey is contaminated. These bacteria don't affect children aged 12 months and above.
  6. Usage of Kajal: There is an age-old belief that putting kajal on their baby's certain body parts help to keep the "evil eye" away and hence people smear kajal all over their baby's eyes, forehead, cheeks and wherever they can. There is no scientific theory justifying this belief. Kajal can actually irritate their eyes and skin. It can lead to watery eyes, itchiness and even allergies. But if you feel like applying it any way you can apply it on the sole of their feet, at the hairline of the forehead and behind their ear. This can be considered as a safer option.
  7. Water Requirement: Many believe that newborns require water which is incorrect. Breastmilk or formula is the only requirement for a baby aged 6 months or less. Water might make him or her full and they will be left malnourished. No matter how hot it is, one shouldn't give water to the infants. 
When a baby is born, people tend to give out many pieces of advice. It is always better to follow the ones which are scientific and the ones to which your doctor agrees. By this, I don't mean that every advice given is incorrect. I only mean to say that some pieces of advice are merely meant for the satisfaction of our ancient beliefs should be omitted if it is harmful to the baby. Proper judgement is necessary before taking any decision especially in the case of our children.

Hope you liked reading this article. If yes, then please like and comment below.

Thursday, July 12, 2018

Dimer Jhaal ( Spicy and Tangy Bengali Egg Curry)

This recipe has to be included in my blog. I've always loved eating eggs. It can be termed as my first love. When my mother used to cook this in her kitchen, I used to stand on a 'Mora' (Manipuri seat made of bamboo) and a look at her attentively. This dish is nothing fancy but I've never eaten any egg curry as delicious as the one prepared by her. So, Finally. Let's get started.

Ingredients:

  • Hard-boiled eggs: 6 make some slits on the eggs as shown in the picture below.
  • Boiled potatoes: 3 medium halved vertically
  • Sliced onions: 4
  • Tomato: 1 chopped
  • Ginger garlic paste: 2 tbsp
  • Chilli Powder: 1tbsp (add more or less according to your requirement)
  • Turmeric Powder: 1tsp
  • Fenugreek or Methi Seeds: 1/2tsp (For tempering)
  • Mustard Oil: 4 tbsp
  • Water: 100ml or 1/2 a cup
  • Salt: To taste
  • Sugar: A pinch

Method:

  1. Heat the mustard oil in a deep bottomed kadhai.                                                                                                            
  2. After the oil reaches its smoking point, temper it with some fenugreek seeds and add the sugar and let it caramelise. This will ensure the reddish brown colour.
  3. Now Add the sliced onions, tomato, ginger garlic paste and the remaining spices including the salt and saute.
  4. After a minute, add in the boiled eggs and the potatoes. Now comes the tricky part. Coat the eggs with the masala by sauteing very gently. If your technique isn't gentle, eggs might break.
  5. Now simmer the flame and cover and cook for about 5 minutes. 
  6. Add in little water and cover and cook till the gravy thickens up to the desired consistency.
  7. Switch off the flame and serve hot with rice, roti or parantha.

 This recipe has always been close to my heart. Though simple, it tastes out of the world. If you like this recipe, please like and share it with your friends.

Tuesday, July 10, 2018

Basic Bath Products For our Babies


When it comes to babies, we reach an extra mile in thinking of what we can give him and provide something which is sometimes of no use. We want our baby's skin to be soft and supple forever which is difficult or sometimes impossible. But we should try our best to provide adequate nourishment to their skin so that it remains hydrated. When we are handling a newborn's skin, tiniest amount of body wash and lotion is required. But when a baby starts to grow, his or her skin tends to lose moisture and appear drier and tend to develop rashes and other skin irritations.


Newborns require products which are free of colours and fragrance. If possible, products which are free of harmful chemicals should be used. I know, it is a task which is somehow beyond the bounds of possibility but there is nothing wrong with reading the labels before applying it to your baby's skin. Certain terms such as 'hypoallergenic' can be ambiguous. It means that the product is relatively unlikely to cause any reactions to the baby's skin but doesn't mean it will suit the baby's skin for sure.


Here are the skincare products required for our little angels:


  • Baby Massage Oil: Massage helps to soothe the baby. It helps to relieve the baby from indigestion and regularises the sleeping pattern. Massage oils help to moisturise the baby's skin and create a slippery surface for easy hand movement. It is better to avoid such oils which are highly perfumed because it may irritate the baby's sense organs. Mineral oils are best to be avoided because the baby's skin becomes drier within an hour or two of application. Coconut oil and olive oil suits my baby's skin very well. Some mothers heat mustard oil with garlic and fenugreek seeds and apply it to the baby's chest while it's still warm to relieve him or her from cold and cough. With the passage of time, one will know what suits their baby. Always start using a little bit and check how it reacts to your baby's skin. Then continue using it if the results are positive.


  • Baby Wash or Soap: Newborns don't require much soap as they don't get dirty that often. When they start crawling, they tend to get much dirtier and the saga continues. Body washes or cleansers are milder as compared to soaps. They are considered to be much hygienic in comparison. There are various reasons involved. The liquid cleansers are stored in a bottle so the product inside isn't touched by hands unless we use the mechanism to take out the product. The liquid cleansers are not left open which doesn't attract germs, unlike soaps. Also, now there are certain cleansers available in the market which is SLS free which isn't in the case of soaps. Choose the product you like using for your baby be it soap or body wash.


  • Shampoo: Babies don't require hair wash that often. But if your baby has thick hair and accumulates sweat and dirt, once or twice a week is more than enough. Choose a tear-free formula so that their beautiful eyes don't hurt and try to use a milder product which is free of SLS and parabens. Nowadays hair and body washes are available in the market which fulfils both the tasks very well. Try the one which suits your baby.


  • Body Lotion: Baby's skin tends to lose moisture rapidly. Dry skin causes rashes and itchiness. Use a good hydrating body lotion or cream for your baby which will allow locking in moisture and provide them with a healthy and supple skin.


  • Diaper Rash Cream: Babies tend to get diaper rashes due to various factors. Their skin might react to urine and stool. Sometimes it can also be caused by reactions to the diaper itself. Diaper rash creams soothe the baby's skin and maintain a protective layer on the skin. Doctors also recommend using petroleum jelly instead. Choose the one recommended by the doctor.


  • Baby Wipes: Baby wipes become handy when we are travelling with a baby. We didn't use baby wipes until the baby turned a month old as my doctor didn't recommend using them till then. Choose the variant which is free of alcohol and avoid any fragrance if your baby is sensitive to it.


When it comes to babies, always consider that less is more. There are certain products available in the market which are attractive but of no use. Some brands even sell baby perfumes which are unnecessary. Babies naturally smell divine. Using artificial scents actually ruins the matter. Don't be attracted to products because they look attractive and are new in the market. Buy only those which your baby actually needs. Also, read the labels carefully and ask a paediatrician before applying the products to your little one's skin.


Friday, July 6, 2018

Niramish Kochur Saag (Mashed taro stems Stir Fry)

'Kochu'(Taro) is a very popular vegetable in Bengal. It is cultivated in those areas where the soil is high in moisture content. Actually, it is one of the few crops which can be grown in flooded areas. In Bengal, it is known as 'Kochu'. The tender shoots (kochur loti), stems (kochur saag) and leaves (kochu para) are also edible. It can be cooked with vegetables, legumes, fish head and prawns. In some parts of Assam and Bangladesh, it is cooked with dried fish. In fact, there is a popular 'Sylheti' recipe known to be cooked with dried fish and taro shoots. Taro is a very versatile vegetable which is highly nutritious. 
Kochur saag is a stir fry of boiled mashed taro stems. This delicacy has always been on the list of my family's favourites since decades. My father in law enjoyed it the most. Some steamed rice and a small bowl of kochur saag and his happiness had no boundaries. He would also suggest us to cook numerous variations of this dish using hilsa fish head or boiled chickpeas. In this recipe, we will be using fried peanuts. So finally, let's get started.


Ingredients:

  • Kochur Saag: 1 kg
  • Water: To boil the kochur saag (if required)
  • Mustard Oil: 100ml
  • Cumin Seeds: 1/2 tbsp
  • Dried Red Chillies
  • Green Chillies
  • Bay leaf
  • Peanuts: 30 grams
  • Tumeric Powder: 1 teaspoon
  • Salt: As per requirement
  • Sugar: As per requirement( I've added 1/2 a tablespoon)
  • Ghee: A tablespoon or more if you like😅😅😅
Method:

For prepping the saag:
Kochur Saag before peeling

Always check for itchiness while cutting the saag. If it makes your hands itchy, it might itch your throat as well after being cooked. 
  1. Peel and cut the kochur saag as shown in the picture below.
  2. Now boil the kochur saag in a deep bottomed kadhai. Add very little water if required as the saag releases enough and now let it cook till it becomes soft.
  3. Now drain the water and let the saag cool down.
  4. Now squeeze out as much water as possible and keep aside.
If you are adding peanuts then fry some in oil and set aside.


For the stir fry:

  1. Heat some oil in a pan and let it come to the smoking point.
  2. Now add the cumin seeds, dried red chillies and let it splutter.
  3. Add the turmeric powder, salt and sugar.                                                                                      
  4. Now add the mashed kochur saag, green chillies, fried peanuts and saute it well

    .
  5. Let it cook till the oil separates and the saag becomes somewhat darker in colour.
  6. Top it up with a tablespoon of ghee and serve it with steamed rice.

Tip: Some people might be allergic to Taro and its other parts. It is best to check for all your allergens before consuming this vegetable

Thursday, July 5, 2018

Thor Bengali Recipe (Banana Stem Stir Fry)

I remember during my childhood days, we had a small banana garden in our backyard. We had a never-ending supply of 'Thor' (banana stems) and 'Mocha' (banana flowers)  throughout the year. My mother used to take care of them like her own child but used to scream and run away as soon as she saw a caterpillar relishing over the leaves or snails attached to the stems! Winters are harsh in my Assam so the plants were unable to bear the cold and die resulting no fruits but flowers. But as the weather changed, they used to grow back on their own without doing any effort. The thor and mocha used to be so organic and fresh and my father and elder sister enjoyed eating it the most. My sister used to call this 'tube light' because it somehow looked like that. I had no interest in eating such gems of our culture. I was happy to have my 'sheddo bhat' with 'dim sheddo' (boiled egg) and butter and refused to eat anything else apart from that. Though sheddo bhat will always remain my all time favourite, now I regret not eating anything of my mother's skills. Therefore, nowadays I try to grab any eatables originated to my culture and make a call to my mother asking her to share her recipe then prepare and if it becomes a success, then write it down on a blog so that my children don't face any difficulties if they try to taste our culture in the future.

Moving on to the banana stems, they are low in calories and highly nutritious. They are said to have many benefits such as the removal of kidney stones, weight loss, managing blood pressure and many more. This is an interesting stir free which tastes great with added health benefits. Try it once and I am sure you'll love it.
Image credit: Anu TChatterjee

Ingredients:

  • Banana stem or Thor: 1 small
  • Water: To boil the thor in a pressure cooker
  • Ripened Jackfruit seeds ( Kathal Bichi): 10 to 12 Boiled and cut diagonally into 4 halves (Optional)
  • Coconut paste or grated coconut of 1/2 a coconut
  • Mustard, poppy seeds and chilli paste: 1 and 1/2 tablespoon
  • Green Chillies: 2 or 3
  • Cumin seeds: 1Tsp
  • Dried Red Chilli: 1
  • Turmeric powder: 1 teaspoon while boiling the thor and 1 teaspoon while stir frying
  • Chilli Powder: 1 teaspoon (Add more or less as per requirement)
  • Salt: As per requirement
  • Sugar: As per requirement
  • Mustard oil: 3 to 4 tablespoon (Add less or more according to your needs)
  • Roasted Panch Phoran Powder: 1 Tablespoon
  • Grated coconut: For garnishing
Method:

Prepping the Thor:
  1. Peel and cut the thor as shown in the pictures below


    Image Credit: Anu TChatterjee
         
    Image Credit: Anu TChatterjee


  2. Then add some salt, turmeric and adequate water to boil the thor for about two whistles and remove the pressure and strain the water.
For the stir fry:

  1. Heat 3 tablespoon mustard oil in a heavy bottomed kadhai.
  2.  Once the oil reaches the smoking point, fry the jackfruit seeds and set aside
  3. In the same oil add the dried red chillies, cumin seeds and allow it to splutter.
  4. Now add the coconut and ginger paste and saute for a minute in medium flame.

  5. Next, add the boiled thor along with the fried jackfruit seeds and saute again.
  6. Add the turmeric powder, chilli powder, salt, sugar, green chillies and saute it.
  7. Now add the mustard and poppy seeds paste and saute it again then cover and cook in low to medium flame for about 5 minutes.
  8. Switch off the flame and add the panch phoran powder and garnish it with grated coconut.

This recipe is better served with rice. If you enjoy this recipe as much as I do, please share and comment below. Take care.